Hi Supermoms,
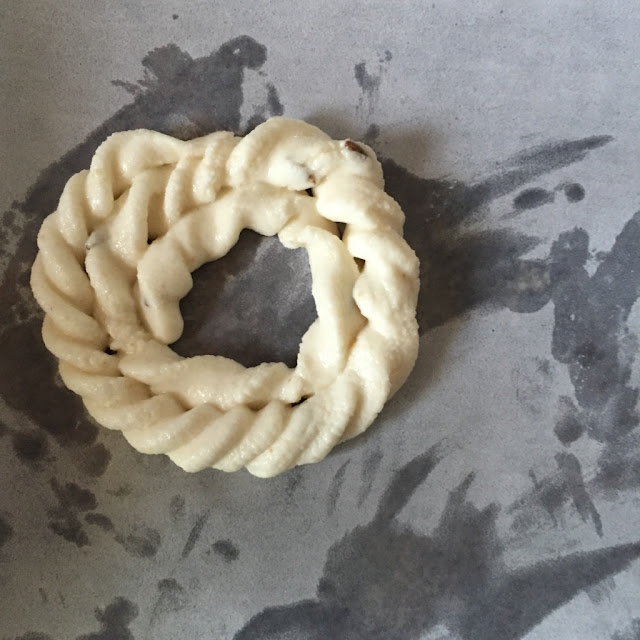
This is my favourite among all the 'Bakshanam'- Kai Murukku. 'Kai' means 'hand' in tamil and 'Murukku' means 'twisted '. So the name literally translates to 'hand twisted' Savoury Snack from TamilNadu, India.
Yes, I agree that shaping the murukku without breaking it is an 'art' but can be mastered with practise.
I am lucky to have learnt it from my MIL and it will take a few more attempts for me to master it.
I am sharing this recipe with stepwise pictures and tips from her so that you can give it a try.
Absolutely worth the effort!!!!
Kai Murukku
Preparation time : 2 hours
Cooking time : 20 minutes
Yield : 15 small Kai Murukkus
Storage : 10 days when stored in an airtight container
Vessel Required : Iron karahi/ Wok
1 Cup = 250 ml
Ingredients :
1 tablespoon Urad Dal / Split husked Blackgram
1 teaspoon Jeera/Cumin Seeds
1 tablespoon Unsalted Butter
Salt to taste
Water (Adjust)
Oil for frying
METHOD:
1. In a bowl, add the freshly ground and sifted rice flour. Add the cumin seeds,urad flour,salt ,butter and mix well. Now add water little by little and make a smooth pliable dough.
2. You can use a greased cling film or clean cotton cloth to shape these murukkus. Take a small portion of the dough ,fix one tip in the cloth and start twisting and shaping slowly. If you find the dough breaking, add little water or oil to the dough.
3. Complete shaping the entire batch and heat a Iron Wok with oil.
4. Do the 'drop test' to check the temperature and then gently lift the Kai Murukkus one by one and deep fry them on both sides so that they brown uniformly. Keep the flame in medium low.
5. Drain the Kai Murukkus in your drain pan or tissue paper.

6. When they are completely cool, store then in a clean dry, airtight container.
Your delicious 'kai Murukkus' are ready for Prashad or to be enjoyed as a great tea time snack.
Chef Tips :
1. You can shape the Murukkus in as many sizes as you want. Marriage Murukkus are made so big !! Practise is the key!
2. Mix the flour well so that the salt is mixed uniformly.
3.Always fry in medium flame.
4. You can make the Murukkus in store bought rice flour too. But the colour of the Murukkus will be deeper .
5.You can make rice with 'Boiled Rice' also. Soak the rice for 2 hours. Grind in a mixer with water to make a smooth batter. Then in a muslin cloth, drain the excess water . Your wet rice flour is ready. Proceed with the above steps.
6. Have lots of patience.
7. Iron Wok is traditionally used for making Bakshanams to get the right colour while frying. If you do not have one, you can use any other pan/wok.
8. Use a dry cotton cloth to shape the murukku . You also use greased 'cling film' , large banana leaf or back side of a ladle.
8. Shape your entire batch and then proceed to start frying.
Happy Cooking!
With love,
Masterchefmom
P.S. : By the time I could take a profile picture of the Kai Murukkus and Seedai , it was way past the sun set and I had poor light to do justice to this amazing traditional South Indian Snack. Shall Update with a new one when I make next time. This recipe is a part of the 'Bakshanam Series' , an effort to bring to you our famous Heirloom Snack recipes.


No comments :
Post a Comment
Your comments here...